Monday, December 16, 2013

Homemade Marshmallows

My little people LOVE marshmallows.  Plain, roasted, in hot cocoa, big, small it does not matter.  They want them... all.

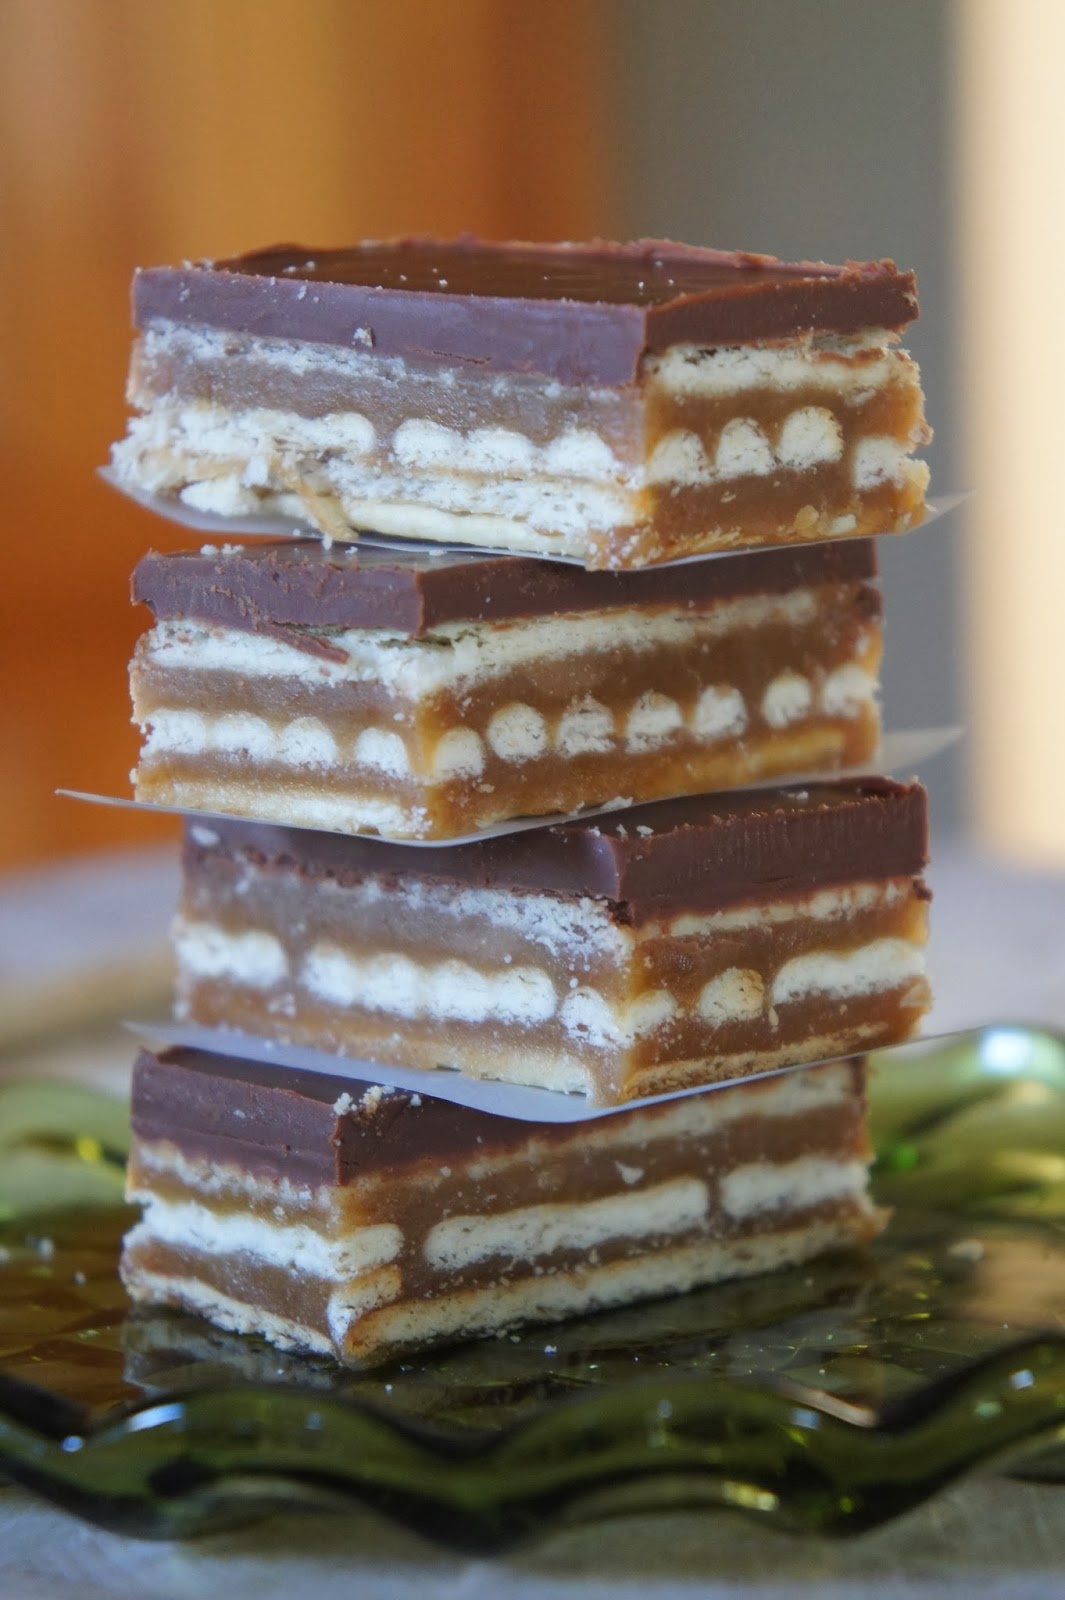
I am not a huge lover of marshmallows.  I like them roasted and that is about it.  However, I am a huge fan of cooking challenges and making my own marshmallows fit the bill.  I found a recipe in an old, old cookbook I have and on a cold and snowy Friday night, decided to give it a try.

Oh.  My.  Goodness.  The difference is huge.  Store bought marshmallows are spongy and pebbly on the outside and taste... well, just sweet.  Homemade marshmallows are smooth and pillowy.  Like a memory foam mattress.  Dense, but soft.  I used a really nice vanilla in mine, so they have great flavor and smell wonderful.  I also dipped a few in bittersweet chocolate just for fun (those are my favorite). 

I discovered the key to painlessly making your own marshmallows is preparation.  If you follow my directions, you will have a full pan of marshmallows setting up in under 15 minutes.  One additional suggestion is be sure to wash your dishes immediately after you are done, so you aren't stuck trying to scrub away stuck on marshmallow in the morning.  Other than that, these are simple and fun to make.  Maybe fancy some up and give them as gifts for the holidays?

 
Homemade Marshmallows
 
Ingredients:
2 c. granular sugar
1 Tbsp. light corn syrup
1-1/2 c. water, divided
4 Tbsp. unflavored gelatin (this is equal to 4 packets or 1 box)
2 egg whites
1 tsp. flavoring, I used vanilla, but you could use peppermint or almond
1 c. powdered sugar for dusting the marshmallows to keep them from sticking
 
Directions:
Butter and liberally dust a 9"x13" pan with powdered sugar.
Combine granular sugar, corn syrup and 3/4 c. water in a large saucepan.
Pour remaining water (3/4 c.) in a small saucepan and sprinkle gelatin over the top.
Place egg whites in the bowl of a stand mixer fitted with the whisk attachment.
Turn heat under sugar mix to medium high and begin to heat, stirring constantly.
At the same time, turn heat under gelatin to low and whisk occasionally until gelatin melts.
Heat sugar mixture (syrup) to hard ball stage (250-265 degrees).
Once syrup is at the correct temperature, take off heat and whisk in gelatin.  This will foam up.
Pour this mixture into a measuring cup to make pouring easier.  Set aside.
Whip the egg whites on high until they form soft peaks.
With the mixer running, slowly pour in the gelatin mixture.  This will continue to fluff up and become glossy and smooth.
Keep beating until mixture is very stiff, but still pourable.
Spread in prepared pan and allow to set up at least 8 hours or overnight.
Once set, flip marshmallows onto a powdered sugar dusted counter.  You may need to use a thin spatula to gently loosen the marshmallow sheet from the pan.
Using a sharp knife, cut into desired shape, dusting all sides with powdered sugar as you go.
 
 
Don't forget to dip some in melted chocolate and hide them on the high shelf in the pantry!


Friday, December 13, 2013

The Real Story-Microwaving Ivory Soap

Microwave a bar of Ivory soap they say.  It will be cool they say.  It puffs up and becomes moldable and fluffy they say.

So I did.

"They" exaggerate. 

It does in fact expand.  A lot.  Like on the walls and door of my microwave, a lot.  And it is not easy to clean up, because...

It is neither mold-able nor fluffy so no little hands can enjoy playing with it (Not to mention the fact that it is still soap.  Foul tasting, eye burning soap.  I kind of didn't think of that when I decided this was a great idea.).  It is brittle.  You touch it and it disintegrates into soap dust.  Teeny, tiny soap dust that sticks to your hand or the surface it is on if you try to brush it into a pile so you can clean it up.  Unless...

You try to wipe it up with a damp rag, then it turns into soap paste that again, sticks to everything and is now foaming.

Now, I have a pile of soap dust:


My only option was to convince my three year old it was "snow soap:.  It was a pretty easy sell because, well, he's three and still believes what I tell him. So, I ever so gently, picked it up and put it in a Ziploc bag to use at bath time.  Worth the effort it took to clean soap expansion overflow off my microwave?  No.  But it could have been a much less painful process if I knew then what I know now (isn't that true of most things?).
 
Learn from my experience and if you want to try to make your own "snow soap"  cut a bar in half, put it on a disposable plate and microwave it for 1.5-2 minutes.  That should solve the overflow problem and you can dump it right off the plate into a baggie keeping the soap dust to a minimum.  If you breed little scientist who want to know why the soap "explodes"  there is a great explanation here .  Happy mess making!


Thursday, December 12, 2013

And the Winner is...

If you are up to date, you know that my family had a cookie exchange this weekend.  You also know that in my family, a little competition is considered healthy so we turned it into a contest to see who had the best cookie.  Unfortunately, we all made copious amounts of cookies and flaked out on making the official winning cookie decision.  However, I am prepared to announce my favorite cookie of the day, AND I will share the recipe with you (season of giving right?).

You will be thrilled to know the recipe for my unofficial winning cookie is simple (only four ingredients) and even (spoiler alert family members) no-bake so it is a great way for kiddos to help with the holiday baking.  Once you make these crunchy, chewy, peanut buttery cookies I promise you will make them over and over.  We do!

 
Special K Cookies
 
 
Ingredients:
1 c. granular sugar
1 c. Karo syrup (white)
1 c. peanut butter
4 c. Special K cereal
 
Directions:
Place cereal in a large mixing bowl.
Heat sugar and Karo in a saucepan over medium-high heat until it comes to a full rolling boil (this means it is boiling so hard, it does not stop when you stir it), stirring constantly.
Remove from heat and add peanut butter, stirring to combine.
Pour over cereal and mix well.
Roll into balls and place on wax or parchment paper to cool.
Store in an airtight container.
 
***Don't know what Karo syrup is?  It is corn syrup, you want the light version for this recipe.***
***For an extra twist, melt some chocolate chips in a baggie, snip off the tip and squiggle over the top of the cookies.  Yum.***


Monday, December 9, 2013

Chewy Lemon Cookies

Tis the season... for cookie baking!  As we discussed yesterday, the ladies of my family enjoyed a cookie exchange over the weekend.  I already shared one of my cookie contributions, and today I will share another.  These will lead up to my announcement of my favorite cookie of the party.  I know you are dying with anticipation.  One. More. Day.

Chewy Lemon Cookies
 
Ingredients:
1/2 c. butter, softened
1 c. sugar
1/2 tsp. vanilla
1 egg
1 tsp. lemon zest (I used more)
1 Tbsp. lemon juice (I probably used more, I just squeezed some in)
1/4 tsp. salt
1/4 tsp. baking powder
1/8 tsp. baking soda
1-1/2 c. flour
1/2 c. powdered sugar
 
Directions:
Cream butter and sugar. 
Mix in vanilla, egg, lemon zest and juice.
Combine dry ingredients (except powdered sugar) and stir into butter mixture until just combined.
Roll into heaping teaspoon sized balls and place on a parchment lined baking sheet.
Bake at 350 degrees for 9-11 minutes.
Cool, then dip tops in powdered sugar.


Sunday, December 8, 2013

Pecan Lace Sandwich Cookies

This morning the ladies of my family got together for brunch and a Christmas cookie exchange.  Back in the day, my mom and her sisters would bake and decorate cookies together.  I remember these parties and how fantastically fun they were.  I wanted to resurrect this tradition, but baking cookies together seemed a little lengthy... and messy.  I decided to host a "Christmas Cookie Munch and Brunch".  Everyone brought a brunch item and a batch of cookies.  To encourage participation, I made it a competition (my family is competitive in a healthy, fun sort of way see more on that here ).

I was not disappointed.  Not only did everyone bring their A-game, they brought multiple games.  We had so many freakin' cookies.  We had biscotti (three types to be exact), wedding cookies, eggnog cookies, chocolate chip cookies, gingerbread, macadamia nut cookies, scones and more. 

Over the next few days, I will share my cookie recipes with you and I will announce my favorite cookie of the party (not that it matters because we baked too many cookies and flaked on the contest).  So get out your parchment and baking sheets and lets go!

 
Pecan Lace Sandwich Cookies
 
These are almost a cross between a cookie and candy.  They are light and crispy, and were a big hit at the brunch.
 
Ingredients:
1/2 c. pecans, toasted and cooled
1/4 c. flour
4 Tbsp. butter
6 Tbsp. packed, dark brown sugar
1/4 c. dark corn syrup
2 tsp. vanilla
1-1/2 tsp. heavy cream
pinch salt
8 oz. bittersweet chocolate, melted and cooled
 
Directions:
Process nuts and flour in food processor until only small pieces of pecan remain.
Combine butter, sugar and syrup in a saucepan and cook over medium heat until boiling, stirring constantly.
Remove from heat and whisk in pecan mixture, vanilla, cream and salt.
Drop by the scant teaspoonful onto parchment lined baking sheets, at least 3" apart (these cookies spread A LOT).
Bake at 350 degrees until cookies are no longer bubbling, 5-7 minutes.
Let cookies cool on baking sheet 10 minutes, then transfer parchment sheet to counter and cool completely.
Spread 2 teaspoons chocolate onto cookie bottoms and gently top with another cookie.
Let chocolate set before serving.
 
***Adapted from a recipe by America's Test Kitchen***


Saturday, December 7, 2013

Mommy Moments

Do you remember the first time you saw snow?  Don't feel bad if you don't, I can't either.  I will however, remember the first time my little guy saw snow, and that is a sweeter memory anyway.


Friday, December 6, 2013

Cinnamon Scented Ornaments

I grew up with a Christmas tree that was decorated with homemade ornaments.  Some were paper, some were clay, some were made of yarn, but they were all made by my sister and I.  It may not have been able to grace the cover of Better Homes and Gardens, but it was beautiful to us.

Now that I have my own children, I realize just how special that tree was, especially to my mother.  All those years I thought it was all about my sister and I and showcasing decorations we made.  I thought my mother hung them every year the same way we hang refrigerator art... to let our children know we are proud of them and their accomplishments.  While I am sure that was part of it, I can now say that it is so much more. 

I now have my own "homemade tree".  Every year we hang ornaments my daughter made when she was three.  When I see them, I remember her chubby little hands and her baby tooth filled smile.  We have ornaments she made of beads and ornaments she made of felt.  I have hand prints covered in glitter.  Each one has a memory of my child's life firmly attached to it.  Whether it was made in school as a surprise, or made together, each one is special and irreplaceable.  So, you will never walk into my house and find an immaculate tree, covered in coordinating bulbs and ribbons.  You will find however, the most beautiful Christmas tree in the world.


Cinnamon Scented Ornaments
 
 
I made these ornaments with my kiddos last year and they had so much fun.  They make your house smell AMAZING and they are so sweet (Not in the eating way, in the cute way.  Don't try to eat them.  They would be terrible.) and simple to make.
 
What you need:
1 c. cinnamon
3/4 applesauce (maybe more if the dough is too dry)
1 Tbsp. glue
rolling pin
cookie cutters
drinking straw
parchment
baking sheet
 
What you do:
Mix together cinnamon, applesauce and glue, adding more applesauce if needed.
Roll dough out to about 1/4" thickness.  Don't roll it too thin or your ornaments will be fragile.
Cut dough into shapes using cookie cutters.
Make a hole at the top of each ornament with the straw.  Don't get to close to the edge or you will not have a sturdy loop for your hook.
Place shapes on a parchment lined baking sheet and bake in a 200 degree oven for about 2-1/2 hours, flipping every 30 minutes.
You can also allow these to air dry, but it will take a few days.
Once dry, loop a hook through the hole and hang on your tree!


Friday, November 29, 2013

Granny Quilt Take 2

I love mixing techniques together.  One of my favorites is crochet and quilting.   I love the combination of the texture that crochet brings with the warmth and stability that the fabric has.  These are great winter blankets since all the "holes" from crochet are covered.  I also love to use them when I put my little ones on the floor.  They have a little extra cushion since they are two layers.  If you want a really cushy version, check out my first take on a granny quilt - Granny Quilt Number 1 .  In this blanket I add a layer of fleece between the afghan and the fabric making it VERY thick and padded.

This version omits that fleece layer, giving you more of a blanket, less of a mat.  The first version is great and extremely warm, but not very flexible which is necessary to snuggly tuck a munchkin in their car seat.  So, if you love the Granny Quilt, but want a thinner option, try this!

My blanket after quilting and trimming.
 
The technique is simple.  Layer your pieced granny afghan on top of a piece of flannel (or cotton, but flannel is so cozy).  Be sure you have plenty of fabric so it hangs past the edge of the afghan.  I left about two extra inches on each side.  The last thing you want is the fabric to creep in while you sew leaving a gap.
Pin at the corner/intersection of EACH granny square.  I know this sounds like overkill, but it serves two important functions. 
First it keeps the layers from shifting and stretching.  The afghan will have a lot of give and having it well pinned will keep you from ending up with a distorted blanket. 
Second, it helps to know exactly where your pins are.  They get lost in the afghan and if you know you have one at each intersection, you will not leave any behind to stab an unsuspecting person.
 
Now sew.  I run along the edges of the squares, but you can do whatever you wish, it's your blanket.  I do all the lines in one direction, then all the rows that run across, forming a checkerboard pattern.  Go slowly!  You have to do this with the crochet side up (so you can follow the lines) and it can easily get hooked on the presser foot.  Finish by sewing around the edge of the blanket.  This will make it easier to sew on the binding.
 
Trim any extra fabric from the edges.
 
 
Now bind and you are done!  Don't know how to bind?  See the simple technique I use here .


Friday, November 22, 2013

Circle in a Square

I love a good granny square blanket.  For instance:


or


My new favorite granny square is a cool, modern and very simple pattern.  I found it on every crafty girl's best friend and worst enemy, Pinterest.


The squares go together quickly and combine to make an amazing blanket.  Crochet on an edging and make and afghan, or sew a flannel panel on the back and bind the edges into a quilt like I did.  It is great for a baby blanket or full scale cover.  Make all the circles one color or each a different color to use up scraps.  The possibilities are endless! 
 
Want to make your own?  Check out the square tutorial from Three Beans in a Pod.  Then check back here tomorrow (or the next day, I might be lazy) for my simple tutorial on adding flannel backing and binding!


Tuesday, November 12, 2013

Bean Bags

I use beans a lot.  Beans are yummy and kids like them.  Beans are easy to mush around if you don't have a bunch of teeth yet.  And, beans are cheap... kind of.

I am always playing mental tug of war when I go to buy beans.  On one side is the much cheaper, but also mushier, store brand can of beans and on the other side, the significantly more expensive, but (I hate to admit) superior quality, can of beans.  I realize we are talking under a buck difference, but that can add up quickly, especially when you use them frequently.

I was watching my new favorite cooking show (new to me, not new to existence), 10 Dollar Dinners, and Melissa d'Arabian was cooking with beans.  She buys dried beans, which she cooks, then freezes.  Holy great idea!

I loaded up on dried beans at the grocery this weekend, then spent a few hours today (okay, it was 4, but most of the time is hands off) soaking, cooking and bagging.  I ended up with the equivalent of 16 cans of beans for less than the cost of 4.  Go me.  Next time I will do it when my 10 year old is home.  Bagging the beans will be a great job for her... and less work for me.

 
How to Freeze Beans
 
 
Soak the beans.
I prefer to quick soak mine which means you combine 1 lb. dried beans and 8 cups hot water in a large pot, heat to a rapid boil for 2 minutes, cover and let stand, off heat for 1 hour.  You can also do an overnight soak.  To do this, add 8 cups cold water to 1 lb. beans and let stand overnight or at least 8 hours.
 
Drain and rinse the soaked beans.
 
Cook the beans.
Add 6 cups hot water to beans in large pot.  Simmer gently until tender.  This will take 1-2 hours.  Check beans at 15 minute increments after the 1 hour mark and cook until tender, but not mushy or falling apart.
 
Drain the cooked beans and rinse in cold water.
 
Bag the beans.
Each pound of dried beans will yield 6 cups of cooked beans.  I freeze mine in 1-1/2 cup quantities which is about the same as 1 can.  Label your freezer bags with the bean type and quantity before you fill them (I know, duh).
 
Freeze the beans.
Again, duh.


Sunday, November 10, 2013

Peanut Butter Crunch Banana Bread

I love banana bread as do my people.  It is a good thing, because I accidentally left my brand new bunch of bananas next to the last banana from my previous bunch and ended up with six, yes six, overripe bananas.  That was a lot of banana typing.

Luckily, each loaf of banana bread requires three overripe bananas.  So, guess who got to make two loaves of bread?...  this girl.  And since I am easily bored, I decided to experiment and create two different types: Peanut Butter Crunch and Double Chocolate.  First, I am going to share the peanut butter version with you, because it was my favorite.  With peanut butter stirred into the batter AND made into crumbles that are layered with the batter then sprinkled on top, it is a peanut butter banana explosion.  So, if you are staring down some brown bananas and want a fresh take on the old standard, try this out.  I promise you will not be disappointed!

 
Peanut Butter Crunch Banana Bread
 
 
Ingredients:
2 c. flour
2 tsp. baking powder
1/2 tsp. salt
6 Tbsp. butter
1/2 c. sugar
2 eggs
3 very ripe bananas
1 tsp. vanilla
3/4 c. peanut butter
3/4 c. brown sugar
 
Directions:
Stir together flour, baking powder and salt in a small bowl.
Melt butter in a pan over medium low heat.  Continue to heat butter until solids (they look like sand at the bottom) begin to turn golden brown and butter smells nutty.  Be careful once it starts to brown, it can burn VERY quickly!  Let cool a few minutes.
Combine 1/2 c. sugar and browned butter in mixer and beat together.
Add eggs, bananas, vanilla and 1/4 c. peanut butter and beat to combine.
Add flour mixture and mix on low until no flour pockets remain.
Using a fork, combine remaining 1/2 c. peanut butter and 3/4 c. brown sugar in a small bowl.
Spray a loaf pan with non-stick spray and spread 1/3 batter in bottom.
Top with 1/3 brown sugar mixture.  Repeat two more times, finishing with sprinkling the last of the brown sugar crumbs on the top of loaf.
Bake at 350 degrees for 55 minutes, or until toothpick inserted in center comes out clean.
 
 
***Want more crunch?  Try crunchy peanut butter instead of smooth.***
***Want another banana bread recipe?  Check out Banana Lovers Banana Bread .***
***Want another super peanutbuttery dessert?  Check out my Peanut Butter Lovers Pie .***


Friday, November 8, 2013

Painting Ceramic Tile

My kitchen backsplash was kind of ridiculous.

 
White, blue and gray.  Great if you like "Home Sweet Home" happy duckling wallpaper, but not so much my style.  Ever tried to take down tile?  Sometimes you're fine, sometimes it peels drywall down with it and then you are screwed. 
 
I did some research and discovered, if you do it right, tile is paintable.  Especially kitchen wall tile since it does not get walked on, or subjected to showering and bathing.
 
It is very simple and inexpensive to do, it just takes a little patience and a steady hand.
 

First, rough up the tile you intend to paint with fine grit sandpaper.  This will help the paint stick.
 
After all the tile is sanded, clean it VERY thoroughly.  I used soap and water first, let it dry and then wiped it well with an alcohol soaked rag, letting it dry completely before the next step.
 
Using a sponge brush, paint each tile with a paint suitable for ceramic.  I find that sponge brushes leave a smoother finish than a bristle brush, which was important to me because I did not want it to be obvious my tiles were painted.  I used Martha Stewart Living metallic paint that is sold at Home Depot and runs just under $6 each.  Allow the first coat to dry and follow with a second coat.
 
Allow to dry overnight and cover painted tiles with two coats of a water based polycrylic.  This will give an authentic ceramic tile shine and protect the paint job you just worked so hard on!
 
These painted tiles can endure wiping, however be careful if you must scrub as they will scratch, so use a soft cloth.
 
So, before:
 
 
And after:


I was VERY happy with how my tiles turned out.  Is it something I would have picked myself to install, heck no, but I can live with it now.  So, if you have awful tiles, but aren't into a tear down yet, try this out.  It is a cheap way to make a HUGE difference!
 
***Like my colors?  The top color is Vintage Gold and the bottom color is Cast Bronze.***
***Got a sharp eye and noticed I changed my hardware?   I bought mine at http://www.atgstores.com/ .  Find my bin pulls here. Find my cabinet pulls here. ***


Monday, November 4, 2013

Peanut Butter Lovers Pie

My people love peanut butter.  They love it in sandwiches, cookies, ice cream, noodles and on spoons.  Most of all, they love it in pie.

I have a peanut butter pie I have been making for quite a few years.  It is a simple, no bake pie and it is super yummy.  Recently, I went to whip one up and remembered my mom making a peanut butter pie when I was little.  Her pie was very different from mine.  It was also simple, consisting of peanut butter and sugar mixed together to make a crumbly concoction that was sprinkled in the bottom of a baked crust and then topped with instant vanilla pie filling.  Easy, but not very peanut buttery.  My version packs a pretty good peanut butter punch, but I decided the peanut butter crumbs from her pie could make it a knockout.  So, here you go.  My new hybrid extra peanut buttery pie.  Be sure you have plenty of milk!

Peanut Butter Lovers Pie
 
Ingredients:
Pre-baked pie crust (want an easy recipe?  Try my simple crust )
1 package Dream Whip, prepared according to directions (you could also use about 3/4 of a tub of Cool Whip)
6 oz. cream cheese, softened
3/4 c, powdered sugar
1/2 c. brown sugar
1 c. peanut butter, divided
2 Tbsp. milk
 
Directions:
Combine brown sugar and 1/2 c. peanut butter with a fork until combined and crumbly.
In a separate bowl, combine cream cheese and powdered sugar and beat until smooth.
Add remaining 1/2 c. peanut butter and milk and beat until smooth and a little fluffy.
Carefully fold prepared Dream Whip into cream cheese mixture.
Sprinkle 1/3 peanut butter crumbs in the bottom of prepared shell.  Top with 1/2 filling. 
Repeat layer and end by sprinkling last 1/3 of crumbs over the top of pie.  Chill. 
 
***Don't have Dream Whip or Cool Whip?  Make 2 c. (finished volume) of lightly sweetened whipped cream.***
 
***Immediately after this post went up, my mother called to let me know that even though her recipe may have called for instant pie filling, she made her own filling from scratch.  She has "never in her life" used instant pie filling.  So, do not doubt my mother's amazing cooking skills.  Apparently it irks her... greatly.***


Tuesday, October 29, 2013

Cheap Almost Acrylic Print

I am an avid Shutterfly user.  I love their books, cards, invitations, and gift ideas.  I also LOVE their acrylic prints (No idea what I'm talking about?  Check it out here ).  Sadly, they are wicked expensive (like over $100 on sale for a 16"x20").  I desperately wanted one to prop up on my mantle in the family room, but I just could not bring myself to spend that much when a picture in a frame would be a fraction of the cost.

I decided to focus elsewhere and was at Hobby Lobby buying beautiful barnwood frames for my "wall of Whiteakers" (If you are again confused, see the post on it here ) and I found the most amazing of things.  A "frame" that consisted of a piece of glass and a backing, held together by small clips.  It was $10. 

 
Long story short, I got my "almost acrylic" print for under $30.  I call that a win.
 
 
***Want to buy your own?  Hobby Lobby offers a few sizes online (here).  Or look for a store near you to pick one up!***
 
***Like my picture?  I printed it at http://www.shutterfly.com/ .  If you live in the Dayton, Ohio area, you can even have one taken by the same photographer, my lovely cousin Tara.  Check out her blog at http://taralewisphotography.blogspot.com/ for more info!***

Monday, October 28, 2013

Caramel Crunchers

My family celebrated our October birthday's this weekend.  I am so lucky to have grown up with such a large loving group of people, but my children's Naners (long explanation, not currently relevant) will be the first to add that I am lucky to have grown up with so many good cooks!

I attribute my family being full of good cooks to two things:  First, my family is also full of creative individuals.  Our collective abilities include painting, spinning, crochet, knitting, quilting, jewelry making, photography, poetry, and on and on.  It is kind of ridiculous how talented my family is. 

The second and more important trait that resulted in so many good cooks is competitiveness.  Not in a bad "in your face, you suck looser" sort of way, but in a "I can't wait for all those bitches to eat my food and realize I am the superior cook" sort of way.  Just kidding.  Not like that either.  It is actually hard to explain, but I will try, just for you.

We love trying new things and are excited to find and create new recipes that no one has ever tried.  My family is great about appreciating a new yummy food and oooh-ing and ahhhh-ing over it therefore,  everyone wants to make something that is new, exciting, and oooooh ahhhhhh worthy.  That is what I mean by competitive.

At the party we had stuffed pepper soup, borscht, white chili, roasted corn chowder, tomato bisque, Chicken gnocchi soup and paninis with fancy cheese (It was a soup theme.  Yes we have themes.  Don't be jealous.).  We also had a REAL lemon pie that my Aunt Anne made from a family recipe that includes directions like "some" "good amount" and "hot oven".  It was tart and lemony and fabulous. 

I made these bars and they appeared to be a hit, and I have to admit it they were pretty tasty.  They are a perfect combination of sweet and salty.  They don't require baking, so they would be a great summer dessert.  They are simple to make (don't be scared of making the caramel, it is easy) and go together quickly, especially if you have a helper to layer the crackers (perfect job for my 10 year old).

Caramel Crunchers
 
 
Ingredients:
Club crackers (you will use almost the whole box)
1 c. butter (2 sticks, I use unsalted since the crackers are salty)
1 c. brown sugar
1/3 c. granular sugar
2 c. graham cracker crumbs (I used 1 sleeve's worth because it turns out, that was all I had)
1/2 c. milk
1 tsp. vanilla
1/2 c. bittersweet chocolate chips
1/2 c. butterscotch chips
2/3 c. peanut butter (I used creamy, but crunchy would be good too)
 
Directions:
Line a 13"x9" pan with foil and spray lightly with cooking spray focusing on the sides.
Cover the bottom of the pan with a layer of club crackers.
In a saucepan, melt butter.  I browned mine because I love the nuttiness it adds.
Add sugars, graham cracker crumbs and milk to melted butter and heat to a boil, stirring constantly.
Continue to boil 5 minutes.  Take off heat and stir in vanilla.
Spread 1/2 caramel (that's what you just made!) over crackers in pan.
Add another layer of crackers followed by the rest of the caramel and then a last layer of crackers.
Heat chips and peanut butter in a small saucepan over medium heat until melted and smooth.
Spread over the top cracker layer.
Chill at least and hour before cutting with a sharp knife.  I used the little indentations from the crackers on the top as my cutting guide to make even sized bars.


Friday, October 25, 2013

The Most Com-fur-table Blanket

My kids are weirdos.  Maybe quirky is a better description...  Well...  Nope.  Weird.  My older son has what I would call a sensory... well I would consider it a problem.

I discovered it while working on my daughter's reading nook (if you missed that post, check it out here).  I bought a super soft, silky and dead free faux sheepskin at Ikea.  I thought it would be a nice place to rest her bare feet while reading in her big comfy chair.  Problem was, it never stayed in her room more than five minutes.  Her little brother would immediately sneak in, grab it, go to a quiet corner, strip off all his clothes and...


Yup...  Weird.  Realizing it was going to be a never ending battle to keep the rug in Emma's room, I decided to make Mr. Man a furry of his own.  Luckily, it is costume season, so the options were plentiful at the fabric store.  I let him choose his fur and a flannel for the back.  I picked a coordinating flannel for the trim and got to work. 

 
I bought a yard of fur and a yard of the flannel for the back, but they were different widths so I laid them out and cut them to the same size, squaring them up a little in the process.  I don't have the time or the inclination to be exact, so I eyeball it.  Mr. Man doesn't care if it's not perfect and neither do I.

 
I bought 1/2 yard of my edging flannel (just to be safe) and cut it into 2" wide strips.  Then I sew them together, end to end, into one long strip.

 
My iron was in the basement and my flat iron was handy, so I used it to press the seams open on my super strip.

 
To make the blanket all I did was sandwich my fabric, wrong sides together and sew on my binding.


A couple of hours and under $15 to make my little weirdo happy.  Unfortunately we may have a new issue..


It appears we have another weirdo in the making.
 
 
***Like my fabric?  Got it all at my local JoAnn Fabrics.***
 
***Don't know how to sew binding on?  Check out how I do mine here .***
 
***Want more kiddo blanket ideas?  Check out more of my blankets here , here , here, and here .***


Tuesday, October 22, 2013

Emma's Reading Nook

I have been struggling to  help my 10 year old daughter to find the enjoyment in reading.  I thought I had her hooked when we found a series of books she loved.  Then we realized it was a new series and there were only four.  Then we found another, similar series.  Again, new and only a few have been written.  I tried old standbys (Nancy Drew and the Boxcar Children), but she was not into them.  Sigh.

I decided to switch gears and try working not on the content, but the experience.  Emma is the oldest of three, with the younger two being boys.  I wondered if she would enjoy reading more, if it was her escape from testosterone, noise, fighting, and Batman on repeat.  So, I set out to create her own little quiet space.

I decided the perfect place was found in her room.  She has two adjacent corner windows that look out over a horse farm and would provide lots of natural light.  I found an appropriately sized, but still comfy chair and nestled it in said corner.  I placed a basket on one side of the chair to hold books, and slung a rose colored afghan my mother made her over the back to snuggle under on cool days.  Last, I found a faux sheepskin rug at Ikea to put at her feet for some softness and fanciness.


She LOVES it.  It is the perfect place for her to sneak off to when insanity is running high.  So, if you are having motivational issues  with one of your minions, maybe try this trick and see if it helps them look at reading in a different light.

Friday, October 18, 2013

Easy Initial Frame

I am finally getting around to decorating my new house.  We have lived here for over two years, but I went and decided it was a good idea to breed soon after we moved in.  My little guy is now almost one and I can occasionally find the time to get some things accomplished around the house.

One glaring issue was the huge barren expanse of wall above my family room sofa.  It kind of had me perplexed.  It needed a large piece of art and I am cheap.  So, I put it off.

While shopping for frames for photos for my grandma's 90th birthday party (sorry about the excessive use of "for"), I came across a fantastic weathered wood frame.  It got me thinking.  What about a GROUP of pictures to mimic a large piece?

I decided I needed six frames.  Now, how to fill them?  I have three kiddos, so they got half of them.  I was still pondering the other three when I was at the craft store.  I came across wooden letters and had an idea for an awesome non-picture piece.  It was super easy and added a focal point that was much needed.   Here is what I did.

 
I took the letter I bought and spray painted it bronze.

 
Next, using the cardboard backing of the frame as a template, I cut a coordinating piece of fabric.

 
I put the fabric inside the frame,

 
then used command strips on the back of my letter (in case I want to change the frame later)

 
and stuck the letter to the glass of the frame.  Be careful not to push too hard.  You don't want shattered glass everywhere.
 
 
Then I hung it on my wall with my other pictures.  Cute right?
 
 
***Like my frames?  Got them at Hobby Lobby for about $17 each.***
***Like my letter?  JoAnn Fabrics for under $5.***
***Like my pictures?  They are 11"x14" prints from http://www.shutterfly.com/ .***
***Oh, you mean you like the actual photos!  The top two and the picture of my daughter were done by my beautiful cousin Tara.  If you live in the Dayton, Ohio area, she can take some for you too!  Check out her blog at http://taralewisphotography.blogspot.com/ .  She is AMAZING!***


Thursday, October 17, 2013

Easiest Pie Crust EVER

I come from a family of cooks.  Anytime we are together the conversation ALWAYS turns to food.  A great new restaurant, favorite food your mom made, best new recipe and on and on.

Today, I am sharing a recipe my Aunt Becky found.  She has been telling me about it for quite a while and I just now got around to trying it.

I have been using my grandma's pie crust recipe for years (see it here along with my recipe for chocolate chip pie).  Occasionally I suffer from amnesia and try another recipe, but the need for a food processor and pie weights brings me back to reality.  I don't have time to go to the bathroom, let alone babysit a baking pie crust that I still have to make filling for.  So back to my grandma's crust I would go.  I didn't think it could get easier until I tried this version.  No rolling or extra dirty dishes.  Winner, winner, pie for dinner.

Pat in Pan Pie Crust
 
 
Ingredients:
1-1/2 c. flour+3 Tbsp.
1-1/2 tsp. sugar
1/2 tsp. salt
1/2 c. vegetable oil
3 Tbsp. cold milk
 
Directions:
Stir together flour, sugar and salt in pie pan.
Measure oil in a 1 cup measuring cup.  Add milk and whisk with a fork to combine.
Dump all at once into flour mixture in pan.
Stir together using fork, until no pockets of flour remain.
Pat out, using fingers across bottom and up sides of pan.  Flute edges if desired.
If you are baking to fill later, prick shell with fork and bake at 425 degrees for 15 minutes.


Wednesday, October 16, 2013

Winey Wednesday-Strawberita

A while back, I gave my review of Bud Light's new Lime-a-Rita (basically, it's awesome).  I loved it so much that when they ran out, I bought a box of the strawberry version...


Utter and total devastation.  I was expecting a fruity and fresh tasting pink concoction, but I got Dimetapp.  The lime version is light, crisp and fresh.  This stuff was heavy, syrupy and tasted like chemicals.  It.  is.  terrible.  Don't buy it.  Buy the lime.  I can't believe the same people make both.  Somebody dropped the ball on the strawberry team.  Boo, hiss.