The twins love Mickey Mouse Clubhouse and two is the age when kids start to feel a little more independent so I decided to make them their own carry-all bags. They will be great for snacks, toys and books. They are also washable (mamma didn't raise no fool).
I have made many of these over the years in varying shapes and sizes. It is a great basic design that can be manipulated in countless ways. Lined, unlined, with pockets or without, big or small, decorative base or not, the options are endless. Once you decide on your dimensions and cut your fabric, assembly takes under an hour, depending on interruptions for diaper changes, snacks and breaking up fights... sigh.
Carry-All's

What you need:
Fabric- For one bag I used 1/2 yard outer fabric, 1/2 yard lining fabric and 1/4 yard accent fabric
thread
ruler
scissors
iron and ironing board
sewing machine
What you do:

First decide on the dimensions of your bag. I wanted mine to be pint sized, but big enough to be useful so I decided I wanted my finished dimensions to be 12"x12" so after adding 1/2" seam allowances, I cut my outside and lining pieces 13"x13". I also decided to put a decorative bottom on my bags. I decided to make the bottom 5" high so once I added my 1/2" seam allowances it was 6"x13". My straps were cut at 3"x15-1/2" for a finished size of 2"x14-1/2". Here is a cut list to make a bag with the same dimensions as mine:
- cut 2 13"x13" squares of main fabric
- cut 2 13"x13" squares of lining fabric
- cut 2 13"x6" rectangles of bottom fabric
- cut 2 3"x15-1/2" rectangles of main fabric for strap lining
- cut 2 3"x15-1/2" rectangles of bottom fabric for strap

First for the ironing. Press under the 1/2" seam allowance on one of the 13" sides of each bottom piece.

Next press under the seam allowances up each long side of the strap and strap lining pieces.

Now for the sewing. Line up the bottom edges of an outside piece with the un-hemmed long edge of one of the bottoms and stitch in 1/4" along the hemmed edge of the bottom piece sewing the two together. Repeat with the other outside piece and bottom.

Next, placing the outside pieces with right sides together and lining up the hemmed edges of the bottom pieces, sew the along the sides and bottom. Repeat with the lining pieces (you don't have to worry about lining up any bottom pieces-they're not there!).

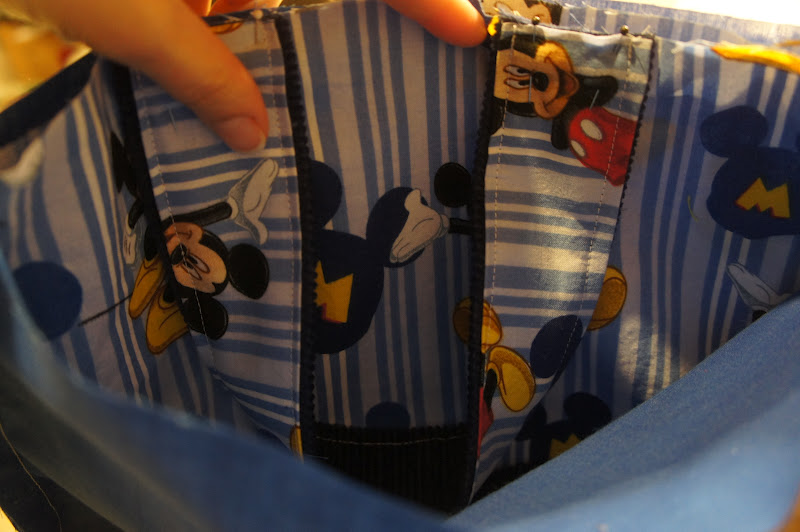
To make a flat bottom, open out one of the bottom corners of the lining. Line up the bottom seam with the side seam

and stitch across about 1-1/2" down from the stitched corner (not the outside fabric corner).

Cut above the stitching, leaving about 1/4" seam allowance. Do this to all four corners (two on the lining and two on the outside).

Now line up a strap piece and a strap lining piece, wrong sides together and stitch in about 1/4" up each side. Repeat on the other strap.
Now comes the hardest part (and even then it's still pretty easy). Pin each strap to an outside side in the location you want (check and make sure they match, don't be lazy). I put mine with the outside edge of the strap about 2-3/4" away from the side seams. I also put my blue fabric (I also used it on the bottoms) facing the outside piece so it would be the outside of the strap with the Mickey fabric as the underneath or lining of the straps.

Then place the outside in the lining with the right sides together. Line up the side seams and pin the top edges together.

Stitch around the top,

leaving an opening so you can turn it right side out. I left from the outside edge of one strap, past the side seam to the next outside edge of the next strap open.

Turn your bag right side out.

Here is an outside shot of the opening I left for turning. You are almost done! All you have left to do is press the top edge being sure to turn in and press the seam allowances on the opening you left so the top is nice and crisp. Finish up by stitching around the top about 1/4" from the edge.


You will now have a carry-all for all your crap! Or your kids crap! Or your husbands crap!
No comments:
Post a Comment