Thursday, August 25, 2016

Plates a Plenty

A few years ago, the great people of Ikea chose our area to grace with their presence.  For about three years, my husband and I binge bought, filling our house with washable sofa's, expanding dining tables for our children to stab with forks and every paper covered floor lamp available.  Family friendly, affordable home goods in a fun shopping environment?  Best thing ever.
So far, I have not regretted a single purchase I've made from the business savvy Swedes.  Except one.  And even that one isn't their fault.
It's the Novogratz' fault.  (Is that how you make that name possessive?  I need to check my grammar book.  But not right now.  Maybe later.  Or not.  You might have to just deal with it.)
I'm not a dish set kind of girl.  Matching plates, cups and saucers in a lovely ivy design?  Not my thing, but we needed new plates and bowls desperately.  I think we were using my husband's stuff from when he moved out on his own in 1996 and took all the hand-me-down's he could get.  I'm also pretty sure we only had enough for like, four people.  Maybe five if one was okay with using a rogue salad plate.
I decided the only way to go was white.  Then I could buy anything that tickled my fancy, as long as it was white, and everything would coordinate without being matchy-matchy.  So, off we went to Ikea and bought dinner plates, salad plates and bowls for twelve people.  It was glorious and I loved the clean look of all white everything.  Life was good.
Then, I caught an episode featuring the Novogratz family on HGTV and it ruined everything.
In this particular episode, the family was at home getting ready for dinner.  One of the kids opened a drawer and pulled out their dinner plates.  I had instant buyers remorse.
Their dishes were different.  Each and every plate was a beautiful, unique design.  Nothing matched, yet somehow it worked perfectly.
Crap.
I've thought about that show ever since and recently, decided I was being stupid.  I can find a new family for my white dishes.  Life is too short.
So last week, I started my collection. 


I found them all at the thrift store down the street and only paid $4 for all three.  It's going to take a while, but I think it's going to be a fun process.  I'll keep you posted!


Thursday, August 18, 2016

Camper Part 2

A few years ago, my husband and I bought our first camper.  We loved traveling and spending uninterrupted time with our kids and it seemed like the right thing to do, and in a certain sense, it was.
Unfortunately, we did not do enough research before dropping more than a few thousand bucks on what turned out to be a pretty hot mess. 
We spent more money and a bunch of time doing our best to get her back in good order, but the more we worked, the more problems and damage we found.  It sucked.  I did a post about the first step we took to stop her from leaking at the seams (it's a real thing and ALL campers will do it if not taken care of properly).  If you want to see what we did, check it out here.
At the end of that post, I said I would tell you how we went a step further to protect against future leaks.  Then...  well...  Sorry.
So, here I am, three years later, giving you the 411 on stopping camper leaks step two.  Let me preface this by saying this is not for all campers.  This is not something you want to do unless you absolutely HAVE TO.  This will NEVER COME OFF.  It is supposed to be permanent and prevent all future leaks and I can say so far it has, but I would NEVER put this on a camper in good or even decent shape.  Our camper walls were already so rotten at the corners some of our screws had nothing to grab on to, compromising the seal during step one so we felt we had nothing to lose.
I found this product online and it sounded pretty awesome.  We bought the webbed version for it's flexibility and the UV protector required and started taping.
We ran the tape up each corner of the trailer as well as on the roof where there was a rip in the rubber.  Once we rolled over all the tape with a roller/our hands to make sure it was well adhered, I pained on the UV protector.
Since we did this, I don't think we have had any more leakage from the areas we taped.  Unfortunately, we figured out the windows were leaking terribly and the guy we bought it from, used builders caulk to try to seal them up (that's a terrible idea).  The leaking windows had caused a huge amount of damage on their own to the interior of the walls.  On top of that, the outside storage hatch at the front passenger side had been leaking for so long before we bought it that the floor of it was rotting out.  That doesn't sound too bad since it's only a storage area, but it's also where the leveling jack is attached, so the last time we used it, the jack crunched up through the floor.
Anyway, the point of this post.  Camper sealing part 2.  Eternabond.  My thoughts.
  • Only use Eternabond as a last resort.  It's not coming off.  Ever.  It will be stuck to your camper for eternity.  Hence the name.
  • Eternabond will look best on white campers.  The UV coting is like white paint so that's what your seams will be.  Big white stripes.
  • I was very happy with the Eternabond and don't have a bad thing to say about it, my issue was lack of knowledge when buying our first RV.
So, where does this leave you?
My first suggestion is to be VERY, VERY careful if you are in the market for an RV.  I'm working up a post on some suggestions when shopping based on our experience to help ya'll out.
My second suggestion is if you, like us, already have a leaky damaged RV on your hands and have nothing lest to loose, Eternabond might be a good option to consider.
I hope this helps all of you out there in camperland!
   

Monday, August 8, 2016

The One I Left Behind

I'm deep in the throes of moving.  I have half my stuff at one place and half my crap at another and it's a little tiring.  And chaotic.  And overwhelming.
It's made me realize I've stretched myself a little thin lately and I need to simmer down.  So this morning, I pushed back the release of my next book by almost a month.
I rushed my last book release and hated every minute of it.  I had to spend every free moment writing and re-writing and it not only took a lot of the fun out of it, it also took away from the fun I was able to have with my people.
Lesson learned.
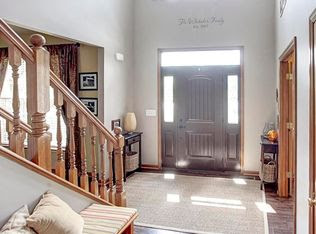
But that's not the point of this post.  The point of this post is to show you the end product of the house we've inhabited for the past half decade.
The house we worked our butts off on.  The house that will make another family as happy as it's made us.
I'm not one to get emotionally attached to a building.  For me, a home is about the people and experiences you have in a house, not the house itself, so I am happy to move my home to a new location.  I will share some before pictures of the new house soon, until then, here is the beauty I am passing on to her new people.