Monday, January 30, 2012

Balsamic Chicken Pasta

You can never have too many chicken recipes.  You can never have too many pasta recipes.  That makes this supper a double do.  It is a quick and simple week night meal that sounds like it is for the grown up palate, but because balsamic vinegar has a sweetness to it, this a kid-friendly dish too.  Like I say, if it can't be thrown in the washer, ran through the dishwasher or eaten by children it will not survive in my house! 


Balsamic Chicken Pasta
Ingredients
3 Tbsp. butter
1-1/2 lb. chicken breasts
salt and pepper
bell peppers (I chopped up 1 red, 1 green and 1 yellow and used half and froze half)
1/8 tsp. red pepper flakes
2 garlic cloves, minced
2 Tbsp. flour
2 c. chicken broth
1/4 c. + 1 Tbsp. balsamic vinegar
2 tsp. minced thyme
1/4 c. grated parmesan
linguine or noodle of choice

Directions
Chop the chicken into bite sized pieces (I do this with scissors) and dry with paper towels.  Season with salt and pepper.

Melt 2 tablespoons of the butter in a large non-stick skillet over medium heat and add the chicken.  Cook the chicken, stirring occasionally, until cooked through.

While the chicken is cooking, get your peppers ready.

I cut mine into slices and then cut the slices in half.

Once the chicken is done, transfer it to a plate.

Melt the remaining tablespoon of butter in the now empty skillet,

and throw in the peppers.

Stir them around and let them get a little browned.  Then add in the pepper flakes and garlic.  Cook about 1 minute, until the garlic becomes fragrant.

Add in the flour,

and stir it around.  Cook it about 2 minutes, this will cook out the floury taste but  it will still retain it's thickening power.

Stir in the chicken broth and 1/4 c. balsamic vinegar.  Heat to boiling and turn down to simmer until thick (this should only take about 5 minutes).

Add chicken back in with any juices on the plate along with the thyme,

parmesan,

and the remaining tablespoon of vinegar. I also added a pat of butter (don't judge me like you would Paula Dean).  Heat this through (it takes like a minute).

Serve over pasta, topped with a sprinkle of parmesan.


Sunday, January 29, 2012

DIY Curtains

So curtains are expensive.  I am cheap.  Enter DIY curtain making.  Curtains are just about the easiest thing you can make.  They are usually made of rectangles that you hem on all sides.  I could tell you how to make a set in one sentence.  Cut a rectangle to fit your window, hem the sides and bottom and fold over and stitch a pocket for the rod at the top.  Boom.  I could even stop this post now and you could go make a pair... but I won't because I want to show you how to make a cuter option.
This is a decorative window covering.  Not really a curtain and please don't call it a valance.  It is not functional.  It does not open and close.  It is just pretty. 
I put wood blinds in my little boys bedroom and wanted something to dress the window up a little without looking girly.  This is what I did.
And this is how I did it.


First things first.  If you want to be able to wash your curtains, wash your fabric before you begin.  If it can't be thrown in the washing machine or dishwasher, the chances of it surviving my house are pretty slim.  Obviously I washed my fabric. 
Once it was washed and dried  I held it up to my window to see how it would look.  I realized it was very see-thru and decided it needed to be lined to look the way I wanted.  I will show you how I lined my curtain, but you do not have to line yours.
I bought 1.5 yards of fabric which ended up fitting my window really well.  All I had to do was trim the top and bottom to make straight edges.  If that is not your situation you will have to measure the window and decide how you want your curtain to look.  I did not want my curtain to gather across the window so I made it the same width as my curtain rod (you could easily make yours gather by making it wider than your window).  My window is also pretty tall and I did not want that much fabric to gather up so my curtain is only about 3/4 the height of my window (if you want to be able to let your curtain down to cover the whole window make it the same length as the window or longer).  Once you know your dimensions it is time to cut.

First I laid my lining fabric out.
Then I laid the curtain fabric I had cut to size on top (don't forget hem allowances in your measurements-I added 2" on the width and about 5" on the height).  Notice my lining is a little bigger so I can cut it to fit the curtain fabric perfectly.  I pinned the two layers together and stitched around, following the edge of the curtain fabric.

Then I trimmed the extra lining fabric.

Now it's time to hem the sides.  I pressed in about 1/2" on each side.

Then folded it over again and pressed.  This gives a nice clean edge.  I stitched up each side and repeated this process on the bottom hem.

For the top you will need to create a pocket for the curtain rod.  The way you stitch the top will depend on how large your rod is and if you want extra fabric above the pocket or if you want the pocket to run at the top of your curtain.  I wanted extra fabric above my pocket and my pocket needed to be about 1" to fit my rod (my rod is pretty small... did that sound dirty?).  First I folded over about 1/2" and pressed it.

Then I folded over about 3".  I stitched one line at the bottom where I had made my 1/2" fold, then about 1" above that line of stitches to make my pocket.  That left a little over an inch of fabric above my pocket for decoration.

I forgot to take a picture after this step so here is a picture a little farther into the process (disregard the small checked fabric for now).  You can see the two rows of stitching.

All that is left to do now is the ties.  Decide how wide you want them.  I wanted mine 3" wide.  I added 1" for my hem allowance.  You also need to decide how you want these ties to work.  Do you want to tie them in knots on the front of the curtain?  Bows?  To you want to only see a strip of fabric on the front like mine?  That will determine how long to make the ties.  I wanted to be able to change mine up so I made mine the width of the fabric (they ended up being about 40" long by the time they were hemmed).  I cut 4 of the strips...

and hemmed the strips the same way as the curtain sides.  I turned in 1/4" and pressed and then folded over again.  I did this to the sides and ends of each strip.

All my pieces are now finished and all I have to do is stitch the ties to the curtain.  I laid mine out to see where I wanted my ties to be.

Then I pinned the ties in place.  One on the front...

and one directly behind it on the back.  Like a sandwich.  I pinned through all layers from the front not from the back, so I could take the pins out as I sewed.
I then stitched the ties to the curtain.

All I had to do was hang it up and get it adjusted the way I wanted it.  I tied my strips in the back for now.  I also folded my curtains up accordion style 2" at a time, but you could just let them gather as you tie for a drapier effect. 
There you go!  I have lots more windows to dress so keep your eyes open.  I just might show you some other ideas!

***Like making your own curtains?  Check out another DIY curtain tutorial here.***


Friday, January 27, 2012

Apple Pie Cookies

I have a severe, debilitating case of mommy brain.  On any given day I can't find my keys, shoes, rings, knitting project, or mind.  I had to scroll through my pictures to see what I have done that needs posted.  Not a good sign for the day to come. 
On the plus side, I saw my apple pie cookies.  When I took them to work for the girls to test out, they cleared four dozen cookies with no problem (except maybe food guilt).  They are a very homey cookie.  I love the cinnamon and ginger with the freshness of the apple.  I will tell you one thing I found.  Because of the apples, they have to be kept in the fridge and once you bag them up, the moisture in the apples soaks into the cookie and makes it soft instead of chewy, so they are best when they are freshly baked.  That makes these a perfect cookie to portion out on cookie sheets and freeze, then transfer to a freezer bag and pull them out and bake a few as the craving for a baked good hits. 

Apple Pie Cookies
Ingredients
2 apples, peeled and finely diced
2 tsp. pumpkin pie spice (this is a mix of cinnamon, nutmeg and ginger)
2-1/4 c. flour
1 tsp. baking soda
1 tsp. salt
1 c. unsalted butter, melted
3/4 c. dark brown sugar, packed
1/4 c. sugar
2 eggs
1 tsp. vanilla
1 c. white chocolate chips

Directions:
Place apples and pumpkin pie spice in a microwaveable bowl.  Cover the bowl with plastic wrap and throw in the microwave for three minutes.  This will ensure the apples are completely cooked in the finished cookie.
While the apples cook, stir together the flour, baking soda and salt.
In a separate, large bowl, stir together the butter and sugars.  The melted butter means no mixer required (it also means the dough will be soft enough to gently mix in the apples, reducing the risk of them breaking up).
Mix in the eggs and vanilla.
Then stir in flour mixture until it is a smooth dough.
Using a rubber spatula, gently fold in the chips and apples.
The dough will be very soft because we melted the butter, so it needs to be refrigerated until it firms up some (about 30 minutes).
Drop the chilled dough by the tablespoonfuls onto a parchment lined baking sheet and bake at 375 degrees for 10-12 minutes.  Alternatively, you could portion the dough and freeze it unbaked.  When you want to bake some up, place the frozen balls on the sheet and bake the same way.
 
***For this recipe I used one Granny Smith apple and one Honeycrisp apple. I chose these because one is tart and one is sweet and I thought it would be a nice combination. These two apples also hold their shape well when cooked. I wanted definite pieces of apple, not applesauce so it was important they stay together.***


Tuesday, January 24, 2012

Bits and Pieces

Sometimes when I am taking pictures for a post, I think of a tip or suggestion.  It isn't really an entire post on it's own necessarily, so I decided to group some of my kitchen ideas together.  I am including some of my favorite tools and products as well as ways to keep waste down.  Some are interesting and I m sure others are not.  None of these are new ideas.  They are not innovative or earth shattering.  I am just hoping you may find them helpful.  If nothing else, you can use it as an excuse to try a new kind of chocolate chips!

My Must-Have Kitchen Tools
I use these four items every day.  I use the smooth big knife (it has a name, I just can't think of it right now, chef's knife maybe?) when I need to slice or chop things using a pivoting or sliding motion.  Mincing herbs, slicing green peppers and celery, chopping lettuce, stuff like that.  I use the serrated version when chopping slippery foods where I need a little grip.  Onions, potatoes, carrots, apples, tomatoes, anything that gets chopped in an up and down motion with very little sliding of the knife (I feel like the serrated blade is hard on my cutting board which is kind of my baby, more on that in a minute). 
On the bottom is my scooper/scraper (also has a technical name I'm sure).  I use it to help me grab and dump the copious amounts of vegetable I chop.  It is also a great dough scraper for when I make homestyle noodles or flat dumplings. 
Last but not least is my chopping block.  It is an end grain style that is about 2" thick, 18" wide and 16" deep.  When I went to buy a cutting board, I scoffed at the $60 price tag and bought a $20 option.  All the way home I thought of this cutting board.  I called my mom.  She helped me justify the price (if I work hard enough, I can justify just about anything) and I turned around and returned the cheap one and bought this one.  It is some of the best money I have ever spent.  It is sturdy and large.  It is also pretty which is nice since it sits out on my counter day in and day out.  If you get one be sure to oil it regularly, so it will retain it's beauty and seal.

Waste Not Want Not
 
Do you end up with multiple loaves of bread that never get used because you go to the store and buy a new loaf and of course everyone would rather eat the new, soft, fresh loaf rather than finish off the old one?  Unless you have a pond with ducks to feed, these probably end up in the trash.  Well no more!  Make bread crumbs!  It is fast and easy with very little work on your part.  Here is how I do it.

Tear the bread into chunks and put it in a food processor.  You may need to do it in batches if you have a lot of bread like I did.
 
Process the bread until it is fine crumbs.

Now dump the crumbs onto an un-greased baking sheet or two and bake at 250 degrees until they are dried completely out.  Stir them every 10-15 minutes.  It may take 30-45 minutes because the oven is so low, but we want them dried and toasted, not just toasted so it has to be done slowly.

Once they are done, use your hands to crumble any that have stuck together
 
and put them in a Ziploc bag to toss in the freezer.  I use these to bread meat and vegetables, top casseroles and even fruit desserts.  You can throw them in meatloaf or meatballs.  Lots of uses and better (and cheaper) than buying store made!

I have come to realize while it looks pretty to have three different colors of peppers in a dish, I never use them all.  I also tend to forget they are in the fridge until they get slimy and gross.  So, I have learned to chop all three peppers, use what I need and freeze the others.  Peppers are one of the few vegetables that actually freezes well (there is a reason you don't find frozen tomatoes or cucumbers at the store).  When I need them, they are ready to be thrown in the pot, no thawing required.

A Few of my Favorite Things
 
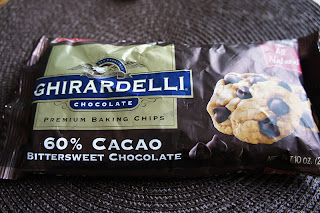
Best. Chocolate. Chips. EVER!

Duncan Hines has the best cake mixes.  I have bought others on sale.  Not worth the savings.

Let me clarify.  I do not, nor should anyone else, drink instant coffee.  I do, however, put it in all things chocolate.  Coffee powder, in small quantities, amplifies the flavor in brownies, cakes, frostings, cookies, hot cocoa, anything chocolate, without giving it a coffee taste.  Try it.  You will be a believer too.

My husband introduced me to this.  We put in in salads on vegetables and sandwiches, as a seasoning before you grill steaks, basically anywhere you want salt, only better.

This is what I use when I make garlic bread of any sort.  It has parsley in it and I'm not sure if I ever taste it, but it sure makes it look pretty (I think I'm all about the looks).  My guilty pleasure is pasta topped with butter, hot sauce and this.  Don't you judge me.

Finally the last of my self-indulgent favorite things.  Lea and Perrins.  I put this stuff in everything.  Meatloaf, sloppy joe's, meatballs, pot roast, hamburgers, it goes in just about anything I make with beef.  It somehow makes it taste beefier.  I also put a ton of it in my Crispix mix (no, NOT Chex mix, gross).  My kids fight over the dark Crispix that have soaked all the Worcestershire sauce up... not each other, me.


Sunday, January 22, 2012

Baked Mexican-ish Rice

I love taco night, but I get tired of the Rice-a-Roni my people like to go with it (don't judge ME, I'M the one looking for an alternative!).Spanish rice is fine, but it seems... bland.  I like BIG flavor.  I came across a rice that was mixed with sour cream, green beans and mushrooms and then baked and it gave me an idea.  What if I did a Mexican version?  It was really, really good.  It is creamy and cheesy and smoky (from the tomatoes).  I now have a new taco night side dish (not to say I won't get bored and come up with more!).

Baked Mexican-ish Rice
 
Ingredients
1 tsp. oil
1 onion, diced
1 Tbsp. butter
1 c. long grain rice
chicken broth (the amount will vary, you'll see why in a minute)
1 c. sour cream
1-4 oz. can diced, green chiles
1-14.5 oz. can fire roasted tomatoes
1 c. shredded monterey jack cheese
1 tsp. cumin
cilantro (this is dependant on taste, my people do not appreciate cilantro, or capers, or pine nuts so it is easier to limit the amount and limit the bit...  I mean complaining)

Directions
Heat the oil in a saucepan over medium heat until shimmering.  Add the onion and cook until it has softened, and is starting to caramelize.
Add in the butter and rice and cook, stirring frequently, until the rice smells toasty and looks translucent at the edges.
While you are working on the onions and rice, put a fine mesh strainer over a 2 c. (or more) measuring cup.  Pour in the tomatoes and let them drain into your cup.  You will have about 1/2 cup of liquid.  Fill the rest of the way up to the 2 c. mark with chicken broth.
Once the rice is nice and toasty, add this tomato, chicken liquid and bring it to a boil then reduce heat, cover and simmer about 20 minutes.  Make sure you keep an eye on this.  It may dry out before the time is up and you don't want it to burn.  We are not adding as much liquid as Uncle Ben tells us to because we want this rice toothsome.  It is going to bake 30 more minutes with sour cream, which has a lot of water in it and we don't want it to get mushy.
Once the rice is cooked, stir in the sour cream, chiles, the tomatoes you drained, half of the cheese, cumin and cilantro.
Pour into a greased 9"x9" (ish) baking dish and top with remaining cheese.  Bake at 350 degrees for 30 minutes.


Saturday, January 21, 2012

Taco Time

So last week I posted the taco seasoning mix I use when I make my tacos.  I hinted at the other ingredients but didn't give you the whole story because I am kind of a stink.  Tacos were on the menu this week, so I will now give you the low down.  I also made an amazing sour cream Mexican rice which I will post for your gastric enjoyment...  tomorrow.

Taco Filling
Ingredients
2 tsp. vegetable oil
1 onion, diced
3 garlic cloves, minced
3 Tbsp. taco seasoning (if you don't know what I'm talking about, you haven't been paying attention)
1 lb. ground beef
1/2 c. tomato sauce
1/2 c. chicken broth
2 tsp. cider vinegar
1 tsp. brown sugar

Directions:
Heat oil in a large skillet over medium heat until shimmering.  Add onion and cook until softened (5ish minutes).
Add the garlic and seasoning and cook, stirring constantly about 30 seconds.
Add ground beef and cook, breaking meat up, until no longer pink.
Add in remaining ingredients and simmer, uncovered until most of the liquid has cooked off (not all).
 
 
***Use this as a filling for tacos, burritos, enchiladas, nachos or even a chile rellenos casserole (maybe I'll make one of those soon, yum.)***

*This recipe is from my favorite cookbook of all time The Complete America's Test Kitchen TV Show Cookbook 2001-2010.  It is the best cookbook I own.  Go buy one.  Today.  Now.

Friday, January 20, 2012

Big Shirt- Little Shirt

So.  I found this cute sweater at my local thrift store.  It was $2.  It was a 2x (I guess $1 per x).  I am a medium, but I loved the color.

And I loved the sleeves.  So I was sure I could work something out.  Right?  It ended up being easier than I thought.  Seriously.  Here is what I did.

First I cut off the bottom band.  Be sure you cut off any stitching so the fabric will have maximum stretch.

When I cut off the band it also removed the stitching that held the front overlap in place, so I stitched that back together.
Then I put both pieces on my dress form (you could also use yourself) and pinned up the extra fabric on the band (I used the top to see where my band should sit).

I pinned all the excess on one side so I only had to stitch one seam.

I stitched the seam,

and cut off the extra fabric.  Then I stitched the new band to the bottom of the sweater, stretching the band to fit the sweater.  I used a straight stitch on my regular machine.  My serger had black thread in it and I was too lazy to want to change it.  I planned on using a small zig zag stitch, but I couldn't get the settings right and did not immediately find my manual, so straight stitch it was.  It was fine.

Boom!  Done!  It looks much cuter on me than the dress form.  A tank top underneath and a great necklace... You will just have to trust me on this one.  Now I realize that the chances of you finding a sweater just like this one are slim to none.  My hope is that by posting how I do my modifications, you will learn techniques that help you on your own projects.  Happy sewing!